
Benefits of using Docker for Odoo on Windows
Docker containerizes services into containers, these containers contain all the required dependencies for the service to run, for example an Odoo container will contain Odoo files and directories, python and its packages, everything that is required for Odoo to run, this eliminates the complexities of installing dependencies and running into compatibility issues.
Containers are lightweight as they do not contain an operating system, containers use the hosts operating system. Docker was originally designed for Linux, but now it supports Windows and MacOS through virtualization.
Using Docker you will be able to run multiple instances of Odoo simultaneously, these Odoo instances can have different versions. In the setup bellow, we will be running Odoo 18 and Odoo 17 simultaneously.
Installing Docker on Windows
Docker can be installed on Windows using Docker Desktop which contains a free plan for individual use. Docker desktop will help you manage your images, containers and volumes, here is a short explanation for each item:
- Images: Contain read-only instructions on how to create containers.
- Containers: Running instances of Docker images.
- Volumes: Allow storage of data outside of containers, as containers are meant to be replaceable (more of this bellow).
Additionally Docker Desktop installs Docker Compose, which is used to setup multi-container apps such as Odoo, as Odoo will require 2 containers, one containing Odoo and one containing PostgreSQL to store data
Docker Compose (Odoo and PostgreSQL)
After installing Docker Desktop, open the app to make sure docker is running, now in CLI (using powershell, terminal or git bash) we are able to use docker and docker compose commands.
Create a directory for our docker project, inside that directory create a docker-compose.yml file, addons and addons2 directories and a config directory containing odoo.conf, here is the structure:
odoo-docker
|--docker-compose.yml
|--addons\
|--addons2\
|--config
   |--odoo.conf
Add the following directives to the docker-compose.yml file:
services:
  db:
    image: postgres:16
    ports:
      - "5432:5432"
    environment:
      - POSTGRES_USER=odoo
      - POSTGRES_PASSWORD=odoo
      - PGDATA=/var/lib/postgresql/data/pgdata
    volumes:
      - odoo-db-data:/var/lib/postgresql/data

  odoo18:
    image: odoo:18.0
    depends_on:
      - db
    ports:
      - "8068:8069"
    volumes:
      - odoo-web-data:/var/lib/odoo
      - ./config:/etc/odoo
      - ./addons:/mnt/extra-addons
    command: odoo -d odoo_db -i base --db_user=odoo --db_password=odoo --db_host=db

  odoo17:
    image: odoo:17.0
    depends_on:
      - db
    ports:
      - "8067:8069"
    volumes:
      - odoo-web-data2:/var/lib/odoo
      - ./config:/etc/odoo
      - ./addons2:/mnt/extra-addons
    command: odoo -d odoo_db2 -i base --db_user=odoo --db_password=odoo --db_host=db

volumes:
  odoo-web-data:
  odoo-db-data:
  odoo-web-data2:
Let's go over each section and break it down, let's start with the db section:
  db:
    image: postgres:16
    ports:
      - "5432:5432"
    environment:
      - POSTGRES_USER=odoo
      - POSTGRES_PASSWORD=odoo
      - PGDATA=/var/lib/postgresql/data/pgdata
    volumes:
      - odoo-db-data:/var/lib/postgresql/data
db: is the name of the container.
image: contains the name of the image on docker hub, in this case its postgres. 16 is what they call a tag, which is the version of postgres, you can go to the images tag section to list all the available versions.
ports: maps container port to host port, in our case we are using the same port for the container and the host(5432). The port to the left is the host port and port to the right is the containers port.
environment: docker images can contain environment variables which are used to define and create certain elements, in this case the variables are used to create a postgres user and define the data location.
volumes: these are used to keep data persistent by storing the data in the host machine and linking it with the container. There are 2 type of volumes that you can create, you can specify the location on your host machine or let docker create the volume for you, in this case docker is used to create the volume called odoo-db-data, this volume is linked to a path within the container where the postgres data is stored (/var/lib/postgresql/data). When creating a volume using docker it needs to be defined, which is done at the very bottom of our yml file.
Now let's break down the odoo section bellow:
  odoo18:
    image: odoo:18.0
    depends_on:
      - db
    ports:
      - "8068:8069"
    volumes:
      - odoo-web-data:/var/lib/odoo
      - ./config:/etc/odoo
      - ./addons:/mnt/extra-addons
    command: odoo -d odoo_db -i base --db_user=odoo --db_password=odoo --db_host=db
odoo18: is the container name.
image: the docker hub image name and tag(version number).
depends_on: makes this container dependent on another container, in this case the db container must be first initialized before the odoo container.
port: maps containers port to host port, in this case we are mapping containers port 8069 to 8068 on the host machine.
volumes: here we are using both docker defined volume and our own defined volumes in the current directory such as the ./config and ./addons directories, in the config directory we will include custom odoo settings and mapping it to the odoo config directory inside the odoo container, inside this odoo config we will include the odoo data directory and custom addons directory which we mapped with our odoo-web-data and ./addons volumes (odoo config file explained further bellow).
command: this allows us to run commands inside the container, this particular command uses the postgres user to create odoo_db database, the -i base flag is used to initialize the data base and must be removed after running it once, otherwise the database will be recreated and data will be lost.
The second odoo instance has similar settings, the difference includes using a different host port and creating a separate addons directory specific to it.
Now inside ./conf/odoo.conf add the following directives:
[options]
addons_path = /mnt/extra-addons
data_dir = /var/lib/odoo
This would map the correct directories inside docker with our volumes.
Adding Custom Addons to an Odoo Container
With the above we have specified the volume ./addons which is linked to the addons_path within the odoo container, therefor any custom odoo module added to the ./addons directory will be accessible within odoo.
Here is a simple custom website module I've created which you can use to test the ./addons directory:
Click to download a custom website module
Launch Odoo/Postgres using Docker Compose
With the above completed we are ready to start docker compose to run our docker containers. Open terminal, powershell or gitbash inside the projects directory and run the following:
docker compose up -d
The -d flag is used to run the process in the background and leaving the shell free to be used, you can remove the flag to see the logs, but since we have docker desktop installed we can see the logs through there.
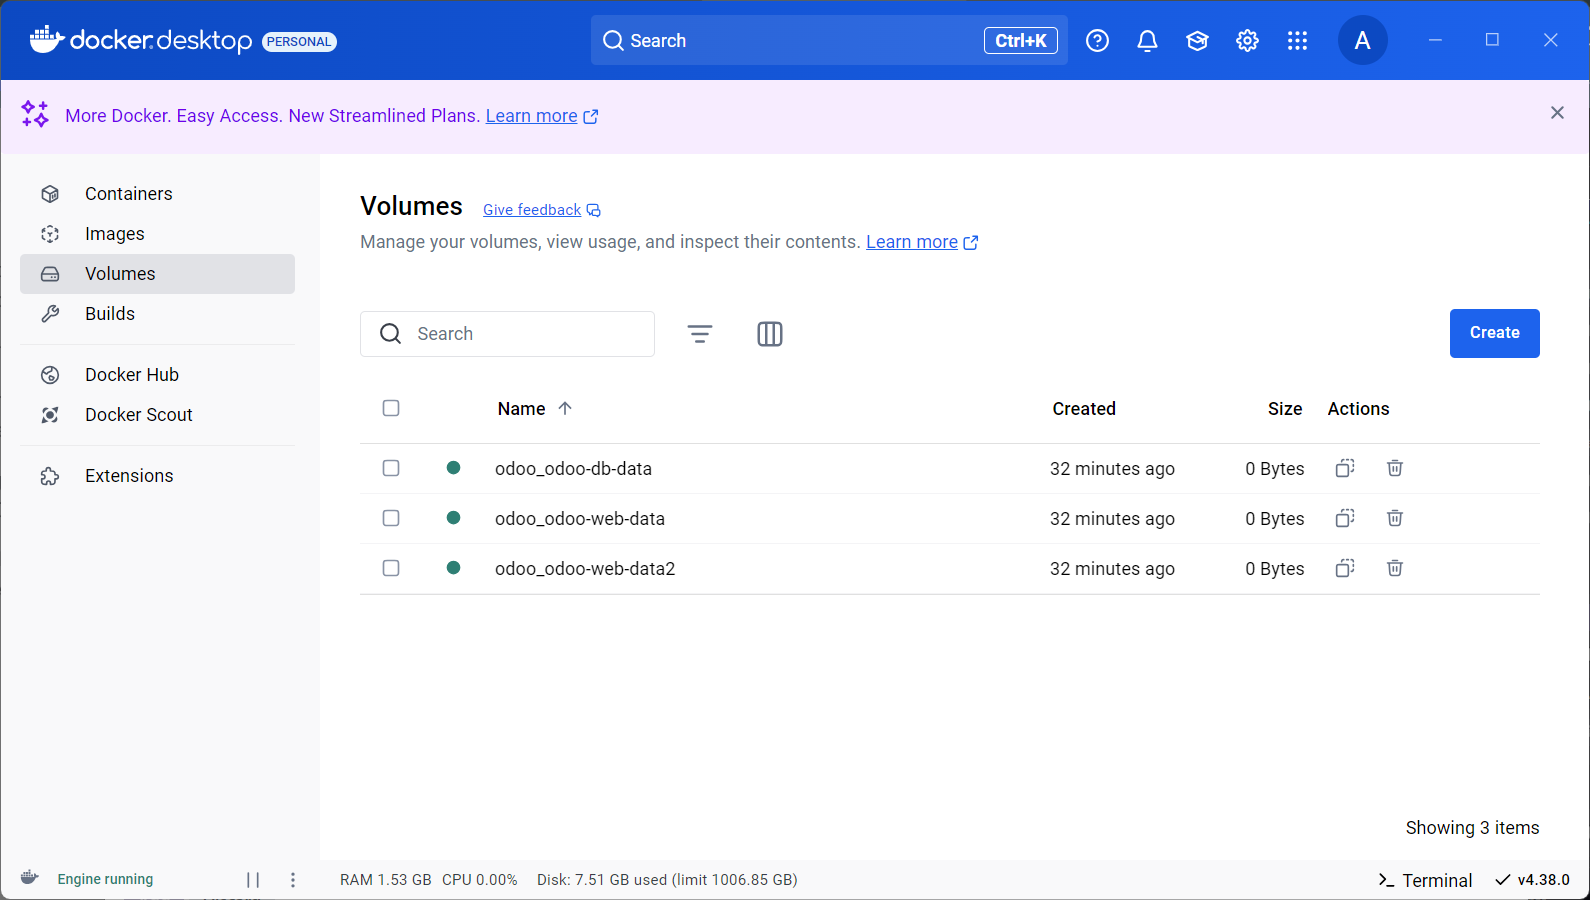
You should be able to view the containers and volumes through Docker Desktop:
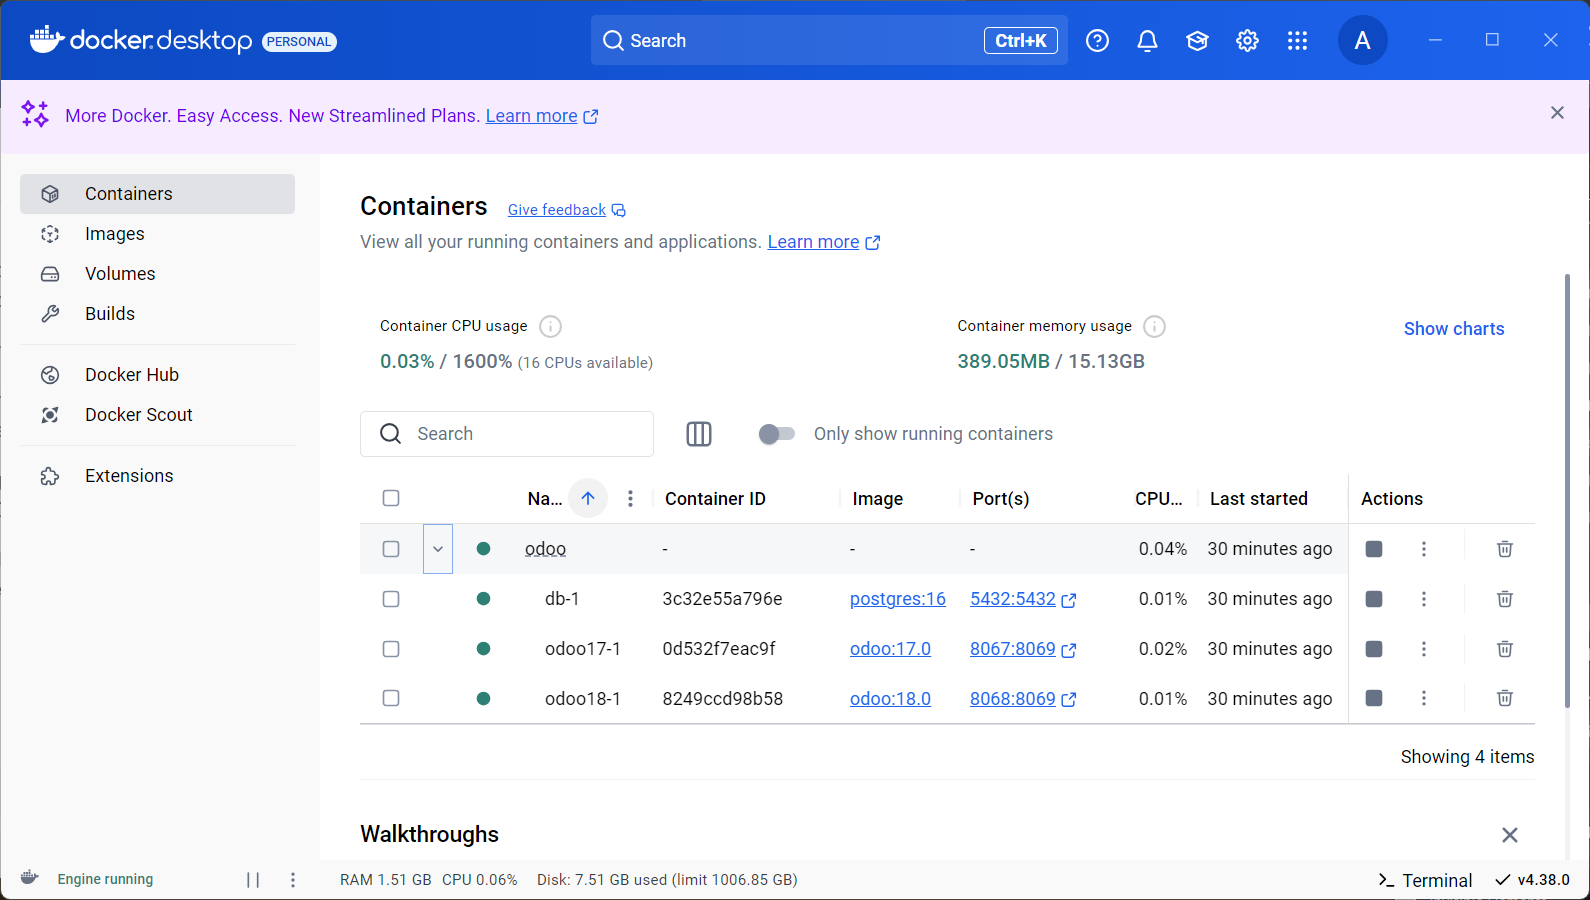
You can click on the container to view the logs, you can also view the volumes created by docker by clicking on the Volumes section to the left:
Restarting Odoo Container and Useful Flags
If you are using this setup to work on a custom Odoo module then you will need to restart the container for changes to take affect, but before restarting there are a few useful flags that you could could add to the docker compose file, first is the -u flag, this flag allows you to update a specific module on restart, for example, using the custom website module provided above, the command will update to:
command: odoo -d odoo_db -u hustle_website --db_user=odoo --db_password=odoo --db_host=db
This would update the hustle_website module on restart.
Another useful flag that you can add is the --dev=xml flag, when using this flag you do not need to restart the container when making changes to XML files, simply refresh the page and the changes are in affect, here is the command with the XML flag:
command: odoo -d odoo_db -u hustle_website --dev=xml --db_user=odoo --db_password=odoo --db_host=db
Taking the above in consideration we can restart the Odoo container by running the following command:
docker compose restart odoo18
We do not need to restart the database, Odoo container alone will suffice, therefor specify the Odoo container name after the restart option to restart it.
Cleaning Up the Docker Environment
In case you want to clean up the environment, you can run the following command which will remove all the containers:
docker compose down
If you want to remove the associated volumes with the containers you can add the -v flag:
docker compose down -v
Incase you removed the containers but not the volumes, then you can remove the volumes by running:
docker volume rm <volume name>
If you do not know the volume name then you can list them by running:
docker volume list
Or simply use the Docker Desktop application to do all of the above.